How to create an MSI Package Installer
Download the utility for creating the MSI package by clicking this link: https://horizondatasys.com/downloads/Tools/appdeploy-repackager.msi
Before you start using the AppDeploy utility, first create an INI file. You can do so by using the wizard from the download package in the root folder -> Deployment Tools -> SetupINIWizard
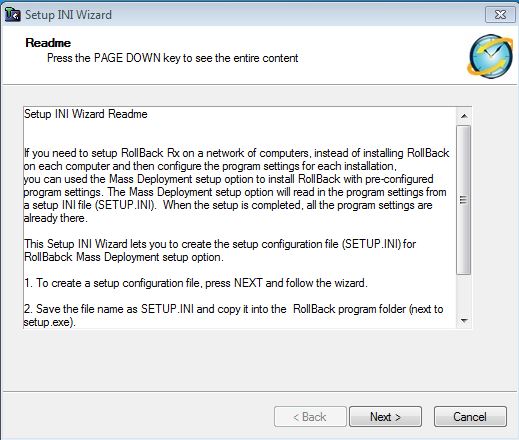
Once you set all the configurations that you want, click Finish and save it to the root folder and replace the existing SETUP.INI file.

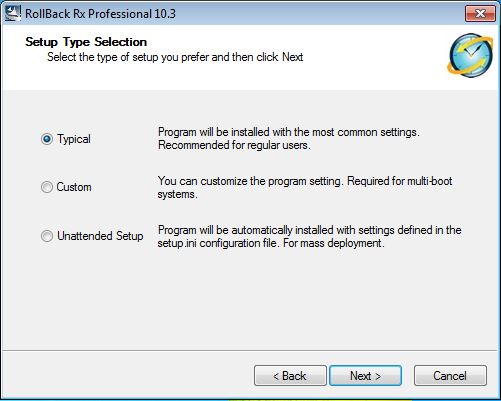
Give the new SETUP.INI a test on your machine to ensure everything is working correctly. You can do so by navigating back to the root folder and running “Setup.exe”. As shown in the screenshot below, choose the “Unattended setup” option that will automatically trigger the “SETUP.INI” you created.
If everything worked correctly, you can move on and start creating the MSI package installer. To do so, follow these steps:
- Go into Windows Explorer -> C: Drive -> create a folder called “Setup”
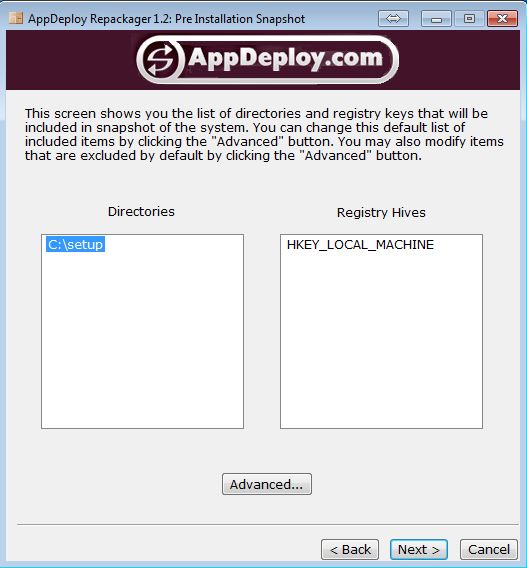
- Open AppDeploy and select “Create an MSI setup based on system changes”. From the setup file location, choose “Setup.exe” from the root folder and the rest will fill in automatically. NOTE: if you see a "v" under the version (example v11.2), please delete the "v"

- Make sure you have the above screenshot settings.
- Click on "NEXT" and it will begin the first initial scan
- After the scan has completed, select "Do not launch Setup.exe"
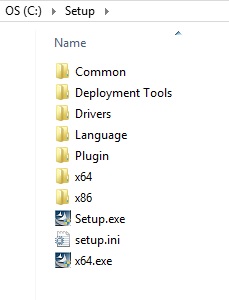
- Before you proceed any further, please copy all the files listed below to the C:\Setup folder
- Go into the "Setup" folder now -> Deployment Tools -> and open SysPrep for Imaging and just browse to the C:\Setup folder and hit "ok'. You will get a confirmation that the system is ready for imaging

- Go back to AppDeploy to trigger the second scan
- Click "NEXT" two times, and it will prompt this Window
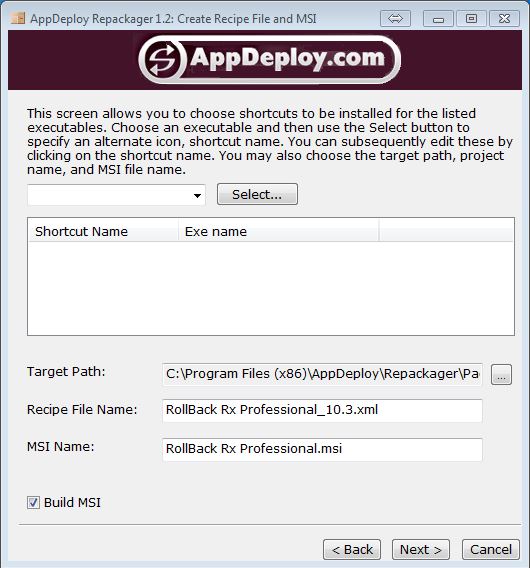
- Click "Select" and uncheck "Program Menu" -> Click OK
- Click on "Next", and then it will start packaging your MSI installer!
If there any problems during this setup please go to our support ( https://support.horizondatasys.com) and Submit a Ticket to our technical support team.
Updated on: 04/29/2025